Why does the front of my hip pinch?
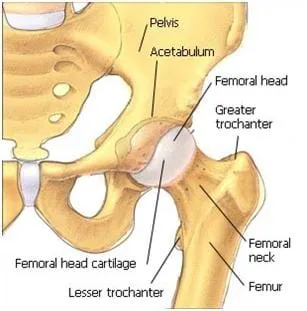
**What can $1 and exercise do to fix my hip?** **Hip anatomy 101** Your hip joint is a "ball and socket" - the ball sits atop your femur, or thigh-bone - this round portion is called the "head" of the femur. The head fits into the socket in your pelvis. The socket fits tightly around like a baseball...
Read More